The Ultimate Setup Guide for Your Om 1 Mark Ii
Introduction
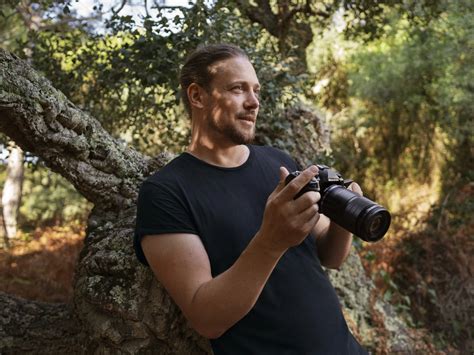
The Om 1 Mark Ii is a high-performance mirrorless camera aimed at photographers who value compactness, robust stabilization, and a versatile lens ecosystem. Whether the buyer is a landscape shooter planning multi-hour hikes, a wildlife photographer tracking fast-moving subjects, or a content creator shooting high-resolution video, the initial setup of the camera strongly influences day-to-day results. This guide walks through practical, real-world setup steps, explains configuration choices, and highlights what buyers typically care about—battery life, ergonomics, autofocus behavior, lens compatibility, and image quality—so the camera can be optimized for each user’s priorities.
Quick Product Overview
The Om 1 Mark Ii continues the Micro Four Thirds (MFT) tradition: relatively small bodies, access to a mature lens mount, and advanced in-body image stabilization (IBIS) systems. Its ergonomics favor extended handheld shooting, and its menu and custom button architecture allow deep personalization. This overview focuses on the features that matter most at setup time: stabilization, autofocus options, file formats, connectivity, and battery/memory management.
Unboxing and First Steps
Out of the box, the basics are consistent with modern mirrorless cameras. Follow this sequence for a smooth start:
- Charge and register the battery: Fully charge the battery before the first session to ensure firmware updates and initial configuration aren't interrupted.
- Insert a fast memory card: Use a UHS-II or similarly rated card for high-bitrate video and burst shooting. Consider a secondary card for backup if the model supports dual slots or for offloading RAW files in-camera.
- Format the card in-camera: Formatting within the camera reduces the chance of file system errors and ensures best write performance.
- Check firmware: After powering up, check for a firmware update and apply it before extensive use—firmware often improves autofocus and stabilization performance.
- Set date, time, and language: Useful for accurate file timestamps and tethered workflows.
Core Configuration: Image Quality and File Management
Decide on primary image capture format first. For photographers who prioritize post-processing flexibility, RAW (or RAW+JPEG) is the obvious choice. Content creators who need smaller files for quick delivery may opt for high-quality JPEGs with tailored Picture Styles.
- RAW vs JPEG: RAW preserves maximum dynamic range for recovery in shadows and highlights—recommended for landscape, studio, and any scenario needing heavy editing.
- File bit depth and compression: Enable the highest bit-depth RAW available and choose lossless or minimal compression if storage permits.
- NR and sharpening: Keep in-camera noise reduction and sharpening conservative when shooting RAW; these can be applied more effectively in editing software.
- File naming and folder structure: Apply a consistent naming convention and choose an automatic folder rollover interval (e.g., new folder per day or session) to simplify backup workflows.
Autofocus and Tracking
Autofocus setup determines whether the camera will perform during critical moments. The Om 1 Mark Ii offers multiple AF modes and customization options—set them according to subject type.
Discover deals on Electronics — updated daily.
Shop Amazon →- Single-point AF: Best for static subjects and precise focusing in portrait or macro work.
- Zone and Expand AF: Use for subjects that move unpredictably within a portion of the frame (kids, street photography).
- Continuous AF with subject detection: Enable animal/vehicle detection when shooting wildlife or motorsports. For people, enable face/eye detection for portraits and events.
- AF tracking sensitivity: Adjust tracking responsiveness—higher for erratic movement, lower for stable, predictable tracking.
- Back-button focus: Assign AF activation to a rear button to separate focusing from the shutter release; this is a favorite among sports and wildlife photographers for control and speed.
Stabilization and Mounting
Stabilization is a standout feature in this camera family. Configure IBIS and lens IS interactions correctly for the best handheld or tripod work.
- IBIS + Lens IS coordination: If a lens has optical stabilization, enable the camera’s combined IS mode (if available) so the body and lens work together—this maximizes blur-free exposures at slow shutter speeds.
- Tripod detection: Use the camera’s tripod or panning detection mode when mounted to avoid IBIS-induced blur during long exposures.
- High-resolution or multi-shot modes: Some cameras offer pixel-shift or high-resolution composite modes that use IBIS logic to shift the sensor. When using these, ensure absolute tripod stability and follow the specific menu prompts.
Video Setup
Video requires different priorities than stills: codec, frame rate, bitrate, and audio capture all matter. Set the camera for the intended delivery format and post pipeline.
- Codec and Bitrate: Pick a codec and bitrate that balance image quality with storage and editing capability. Higher bitrates preserve m…
- Wi‑Fi and Bluetooth: Enable the manufacturer’s mobile app for quick previews and transfers. For large RAW file transfers, consider wired methods or card readers for speed and reliability.
- Tethered shooting: If shooting studio or product work, set tethering options for reliable connection to a laptop or tablet. Use a dedicated tethering mode to avoid intermittent sleep behavior.
- Geotagging and time sync: If accurate GPS data matters, enable location services through the mobile app or record location metadata via connected devices.
Custom Buttons, Menus, and Myset Presets
One of the strengths of this camera line is deep customization. Use custom buttons and preset slots to switch quickly between shooting styles.
- Assign common actions: Configure frequently used functions—AF mode change, ISO, white balance, and drive mode—to dedicated buttons for fast access.
- Save Myset or custom modes: Store a set of settings (e.g., landscape, wildlife, video interview) to a single dial position. This saves time when switching between different assignments.
- Function menu: Populate the quick menu with the 8–12 most-used items so changes are two clicks away.
Maintenance, Weather Sealing, and Travel Prep
Keeping the camera in peak condition matters, especially for outdoor work. Buyers who travel or shoot in harsh conditions care deeply about durability and serviceability.
- Weather sealing: Confirm that both body and lens are sealed; keep a small blower, microfiber cloth, and sensor-cleaning tools on hand for field cleanup.
- Spare batteries and charging strategy: Bring at least one spare battery for day-long shoots; a USB-C power bank can extend life in emergencies if the camera supports USB charging.
- Storage and transportation: Use a protective camera bag with configurable dividers. For air travel, keep batteries in carry-on luggage per airline regulations.
Pros & Cons
- Pros:
- Compact, ergonomic body that reduces fatigue during long handheld sessions
- Robust in-body stabilization that aids slow-shutter handheld shots
- Flexibility of Micro Four Thirds lens ecosystem with many compact options
- Highly customizable controls and Myset presets for rapid workflow changes
- Strong video features suitable for run‑and‑gun creators and hybrid shooters
- Cons:
- Smaller sensor format than full-frame competitors, which affects shallow depth-of-field and certain high-ISO performance
- Some users may prefer a larger lens selection for certain specialized focal lengths or budget-priced fast glass
- Battery life can be limited with heavy electronic viewfinder or video use—requires spares for extended sessions
- Deep menu systems have a learning curve before customization becomes second nature
Comparison Table
Feature Om 1 Mark Ii OM‑1 (previous generation) Sony A7 IV Fujifilm X‑T5 Sensor Format Micro Four Thirds (MFT) Micro Four Thirds (MFT) Full-frame APS‑C Stabilization Advanced IBIS with lens coordination Strong IBIS Excellent IBIS, benefits full-frame Effective IBIS for APS‑C Lens Ecosystem Large MFT selection; compact primes & zooms Large MFT selection Extensive full-frame native lineup Growing X mount selection, strong primes Ergonomics & Size Compact and travel-friendly Compact Larger, more robust grip Balanced retro layout Best Use Cases Travel, wildlife, stabilized handheld shooting Travel and handheld Professional hybrid photo/video work Street, portrait, general-purpose APS‑C Buying Guide: What to Consider Before Purchase
Define the Primary Use Case
Buyers should prioritize based on what they shoot most often:
Find top-rated Electronics products at great prices.
See Deals →- Travel and hiking: Portability and battery/charger strategy are paramount—MFT bodies and smaller lenses are advantageous.
- Wildlife and sports: Autofocus tracking, frame rate, and telephoto lens options matter; stabilization helps when long lenses are handheld.
- Landscape and studio: RAW quality, dynamic range, and tripod high-resolution modes are priorities.
- Video creators: Look for codec options, log profiles, cooling, and port selection for audio and external recorders.
Lens Strategy
The Micro Four Thirds mount provides many compact lens options. Buyers should:
- Choose one or two “workhorse” lenses for most situations (e.g., a versatile wide-to-standard zoom and a medium telephoto or fast prime).
- Consider weight and portability—MFT lenses can be far smaller than full-frame equivalents, which affects packing and handling.
- Rent specialty lenses (super-telephoto or tilt-shift) when needed instead of buying outright if budget and storage are concerns.
Accessories to Budget For
- Extra batteries and a multi-battery charger
- High-speed memory cards (UHS-II or equivalent)
- Protective filters and a reliable tripod for landscape and long exposures
- External microphone and simple audio adapter for interviews or vlogs
- Camera strap or sling for comfort during long shoots
Service, Warranty, and Resale
Buyers who travel frequently should check international warranty coverage and service centers. Additionally, gear that is well cared for and has original packaging tends to command higher resale value if priorities change.
Real-World Use Cases and Practical Tips
Practical setups for common workflows:
Landscape Photographer
- Shoot RAW with conservative in-camera sharpening; use IBIS in tripod mode when the camera offers it, or disable IBIS for pixel-shift modes.
- Use a low ISO and small aperture for maximum depth of field; bring a sturdy tripod and quick-release plate to reduce setup time for multiple compositions.
Wildlife and Birding
- Use continuous AF with animal detection, enable maximum burst rate with an adequate card, and map a custom button for AF point repositioning.
- Pack extra batteries; long telephoto lenses and electronic viewfinder use will drain power faster.
Content Creator / Run-and-Gun Video
- Choose a log or flat profile if color grading is planned; use autofocus with smooth transition settings and a small amount of sharpening.
- Stabilization will help handheld shots; however, consider a gimbal for more cinematic movement.
Final Setup Checklist
- Charge battery and format memory card in-camera
- Install latest firmware and set date/time
- Set RAW/JPEG preferences and image quality
- Configure AF mode, tracking sensitivity, and back-button focus if desired
- Set IBIS/Lens IS interaction and tripod detection
- Assign custom buttons and save Myset presets for common workflows
- Test lighting and exposure in the field; adjust ISO and exposure compensation strategy
- Pack spare batteries, cards, and a cleaning kit for extended shoots
Conclusion
The Om 1 Mark Ii offers a robust blend of portability, stabilization, and customization that suits a wide range of photographic and video workflows. Proper setup—choosing the right file formats, configuring autofocus and stabilization, and customizing controls—translates the camera’s capabilities into consistently better results. Buyers should align lens choices and accessory budgets with their most frequent use cases: travel photographers will prioritize compact primes and spare batteries, while wildlife shooters will emphasize AF settings, telephoto reach, and fast cards. With a thoughtful setup and a few essential accessories, the camera can be a remarkably flexible tool for both serious hobbyists and professionals alike.